
Call Us Today!
Call Us Today!


As a professional interior painter in Denver, we know a thing or two about what it takes to prep for an interior paint project. Good prep is key to achieving professional results.
Interior paint preparation involves a series of steps that are intended to create a clean, smooth surface that is ready for paint.
In this article, we will outline the steps involved in how to prep your home for interior painting.
The first thing you need to do before painting your interior is to clear the spaces that will be painted. This involves removing wall decor, furniture, and window treatments, and centering furniture in the middle of the room. This will allow our team of professional painters to access all areas of the walls without obstruction.

Related: Common Interior Painting Mistakes and How to Fix Them
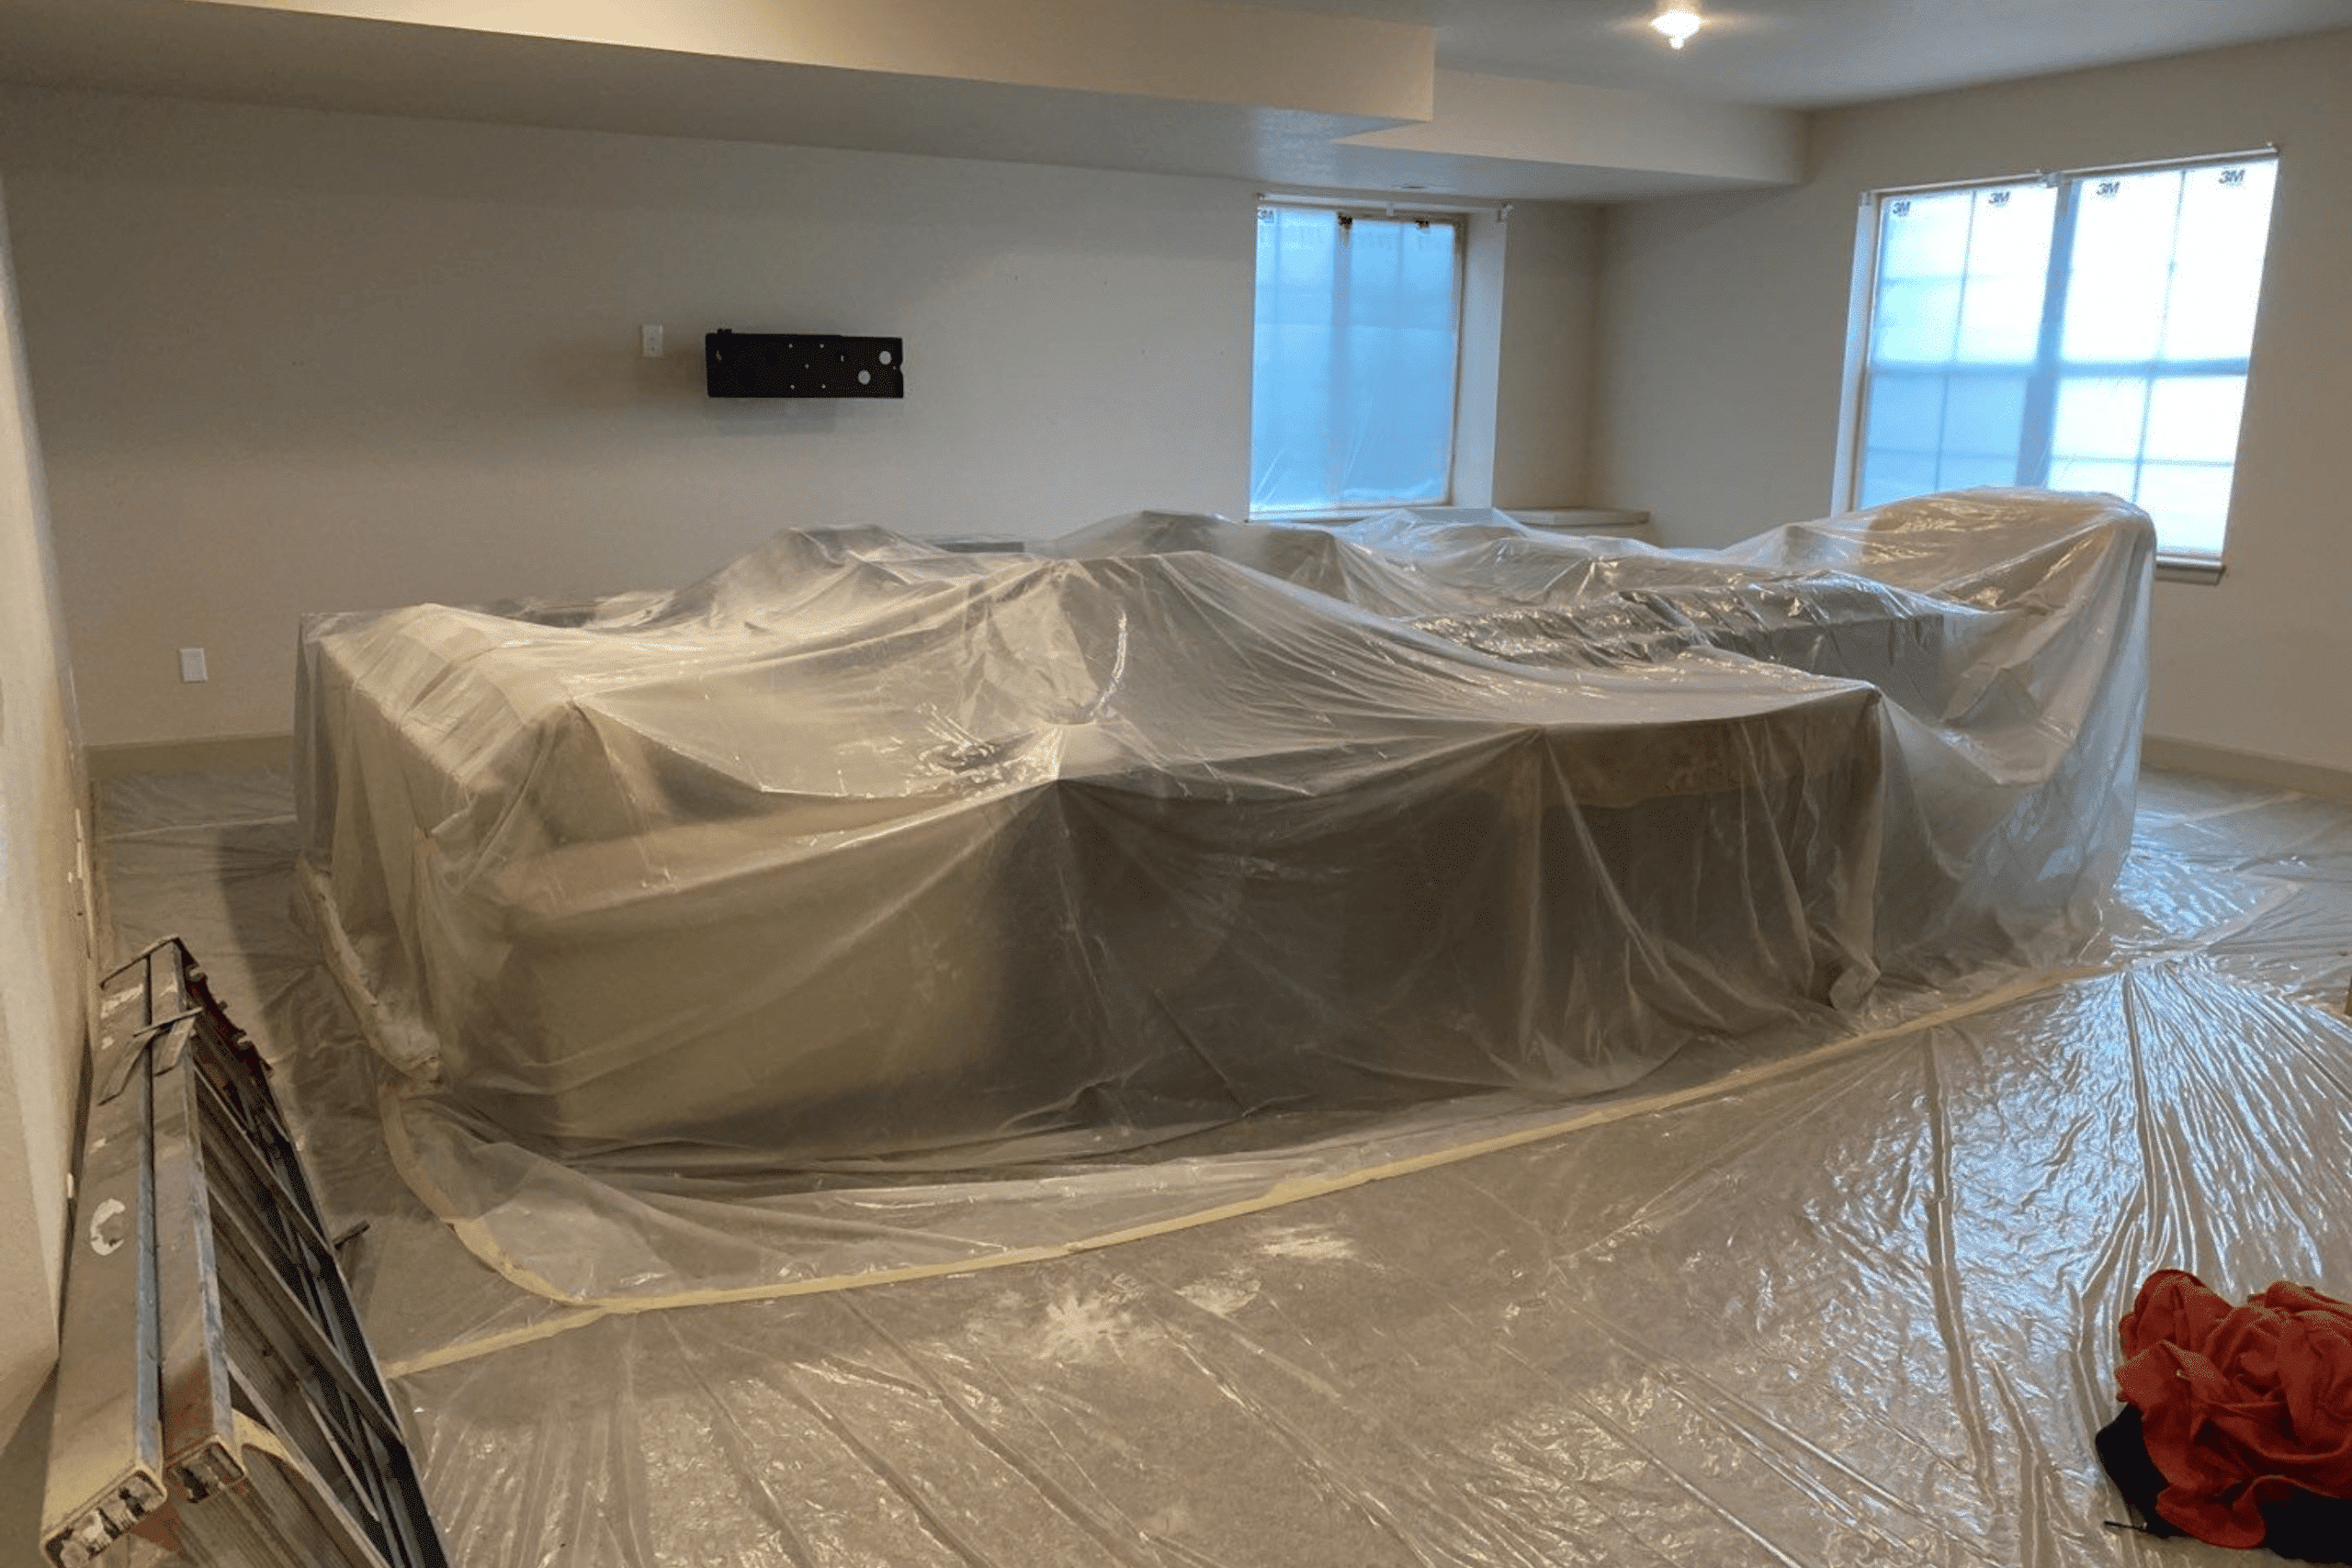
Once the area is cleared, we will prep the area by covering the floors with either builders grade paper or plastic. We also always make sure to protect the pathway inside your home leading up to the workspace.
After the floors are protected, we begin masking off all items not being painted, such as windows, built-ins, smoke alarms and remove all light plates and outlet covers.
Canned lighting and ceiling fans will all get masked and lowered if possible. All furniture items will be covered with plastic and sealed to the floor coverings so we can avoid paint dust getting onto your belongings. This is to ensure that these items are protected from any droplets of paint or paint dust.
Once everything is protected, we can move forward with caulking. Baseboards and windows will be caulked with a long-lasting flexible latex-based caulk, perfect for joints that may be exposed to moderate levels of wear and movement. Nail or screw holes can be filled with painters putty and knicks or dings in the drywall can be patched.
We use drywall compound or mud to fill, retexture, and blend to as close of a match as possible to the existing texture. For larger drywall issues, we always recommend hiring a drywalling professional, as drywall finishing is a separate trade from painting that requires its own unique skill set and tools.
After the area has been caulked and patched, the next step is painting. The painting process is typically broken down into three major stages: ceilings, trim, and walls.
Although certain projects might require us to change the order, we typically paint ceilings first, then trim, and walls last. All homes have their quirkiness and can adjust how we approach our techniques.
During most paint applications, the ceilings are sprayed with a small amount of overspray intentionally onto the tops of the walls to get full coverage into the corner where the walls meet the ceilings. We try to complete all ceilings in the home before we move onto the next phase.
We then clean out our sprayer and begin spraying the trim while the ceilings are drying. Trim can include doors, window sills, baseboards, banisters, chair rail, wainscoting and crown molding. The same intentional overspraying technique is used when applying trim.
Once the ceilings and trim have completely dried, we start masking off those painted areas to begin wall painting. By masking off the painted areas, we can achieve crisp lines and no longer need to practice the same intentional overspray, as those freshly painted areas are now protected.
We’ll clean out our sprayer one more time to change the paint for the walls. If we have accent walls in a different color, we will usually begin with those areas so they can dry before we paint the walls adjacent to the accent placement.
Typical dry time here in Colorado is about two hours, but our wild weather and relative humidity can play a role in the drying process.

The final step in the painting process is clean up. During clean up, we remove our tape, paper, plastic and check for touch ups that might be needed. After the painting is completed, we typically perform what we call a “final walkthrough” with you to ensure that you are completely satisfied with your interior painting project.
We want to make sure that every detail has been attended to and that you are happy with the final result. If there are any touch-ups or additional work that needs to be done, we will address it before the project is considered complete.
We also never require down-payments or deposits for your interior painting project. We only accept payment after you have had the chance to approve of our work and you are fully satisfied with the results.
It is vitally important to choose the right paint and materials for your interior painting project. There are so many brands and varieties of paint and paint sheens out there to choose from.
We will help you select the best brand, type of paint and sheen for your specific needs on your project. We always consider the type of surface or substrate being painted, your desired finish, and the coverage and durability of the paint that we use.
Read more here about the best types of paint for your interior.
Choosing colors can be a huge headache for homeowners. As a Denver interior painter, colors can be one of the biggest pain points for our clients. To help with color selection, we offer in-house color consultations with one of our certified color designers. They can help you find the perfect color for your space!
With our color consultation service you will be provided with samples, color swatches and custom digital mock-ups to help you see the color on different walls and in different lighting. It’s so important to find the right color for your space before painting so you can be confident in the final results.

Related: Benefits of Having a Color Consultant
We know painting can be disruptive to your daily life, so we work diligently to make sure we minimize any inconveniences and make your painting experience as enjoyable as possible.
Your Project Manager will be there every step of the way to communicate clearly with you throughout the project and ensure that everything is moving on schedule and up to our high standards!
Our goal is to provide you with outstanding customer service and leave you feeling stress-free and excited to come home to your freshly painted interior.
Related: Questions to Ask Your Color Consultant
Interior painting can take a lot of preparation. Prepping for an interior paint project is vital to ensure a professional finish and results you are happy to come home to.
Performing proper prep work is essential to creating a beautiful and long-lasting paint job. Your interior paint project should always be executed with high-quality materials, skilled technicians and a high level of attention to detail.
By adhering to our professional standards and excellent customer service, we believe we can provide you with outstanding interior painting results that will leave you fully satisfied!