
Call Us Today!
Call Us Today!

The first step to professionally paint cabinets is to fully prep the kitchen or whichever area of the home you’re going to use for the remodel. Make sure to remove all breakables from the counters when you prep an area for your cabinet refinish. You should also use heavy paper on the floors so they are fully protected. When doing any interior painting project it’s important to know that prep is the most important part of the painting process.
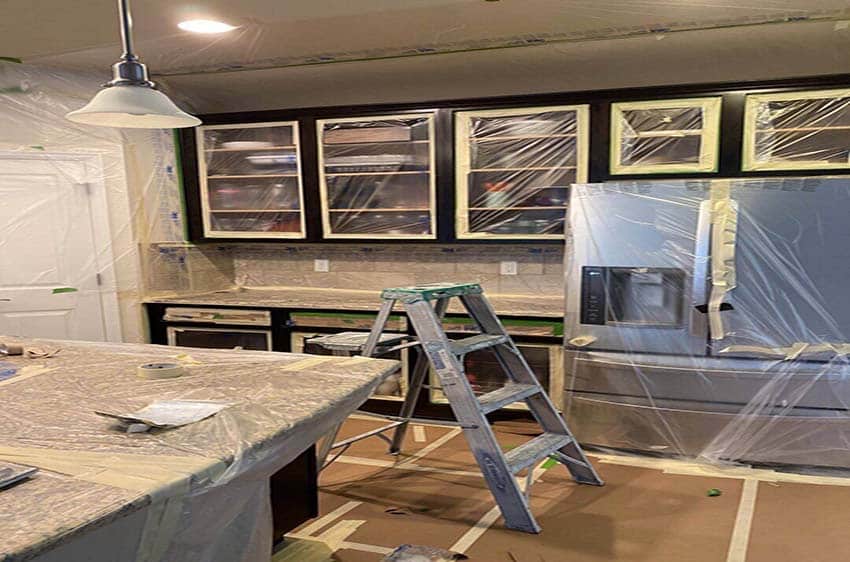
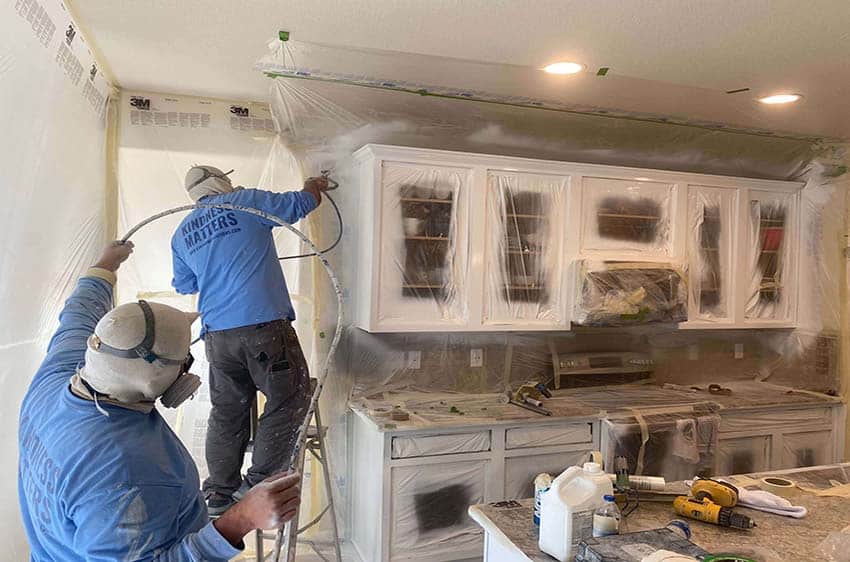
The next step is to plan the location you’ll use to spray the cabinet doors and drawer covers. If the home is empty you can use any open space like a living room or dining room. However, if the home is occupied you’ll need to use a space like an unfinished basement or an empty garage for the spraying. These areas must have enough room to spray the doors/drawers and hang or stack them to dry during the curing process. It’s also very important to mark all hardware and doors so you know where they were originally installed.
Once all the doors and drawers are disassembled you’ll need to mask off around the cabinets to prepare them to be sprayed. You always want to mask off the counters, walls, backsplash, and the insides of all of the boxes so no paint enters the cabinets. The great news is that you don’t have to remove all of the items from the drawers or cabinets as long as they aren’t overfilled and can be protected with plastic.
If you’d rather watch than read, we encourage you to check out this video where Kind Home Solutions Owner, Michael Sutton, goes through the six steps to painting cabinets like a pro:
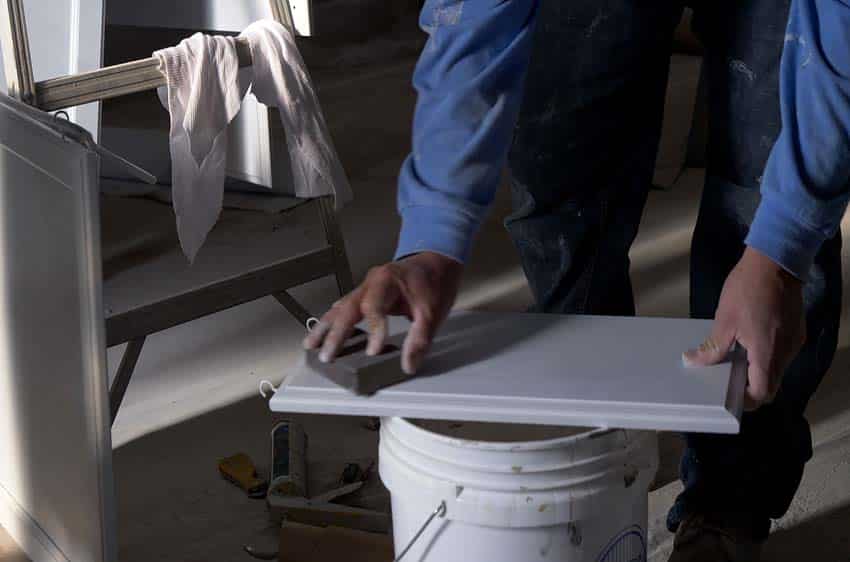
The second step to professionally painting your cabinets is lightly sanding all surfaces of the cabinets and doors. It’s best to use a dustless, random, orbital sander so that no damage is done to the wood prior to painting. Always be sure to remove or scuff off the top clear coating of the stained cabinets to provide a surface that the primer and paint can fully adhere to. A good grit of sandpaper to use on cabinets tends to be between 120-220 grit. If the grit is much lower it might cause damage to the wood, and if it’s much higher you won’t be able to get through the clear coat on the cabinets.
After you sand the doors it’s important to give them a good cleaning. Make sure to remove all dust and there isn’t any hidden grease or debris left on the doors. You also want to make sure to use a product that won’t leave any residue. A good cleaning product is Krud Kutter, but if you happen to have Denatured Alcohol on hand it works just as well. Everyone should fully read the instructions on all products before starting your project. Some chemicals aren’t meant to be mixed together such as a TSP cleaning agent and Shellac Primer.
Once all of the cabinet boxes have been prepped, sanded and cleaned it’s time to get the primer coats on! You need to fully build out your spray booth for the doors and drawers before applying your primer. Also, make sure that the areas around the boxes are fully protected and safe to spray.
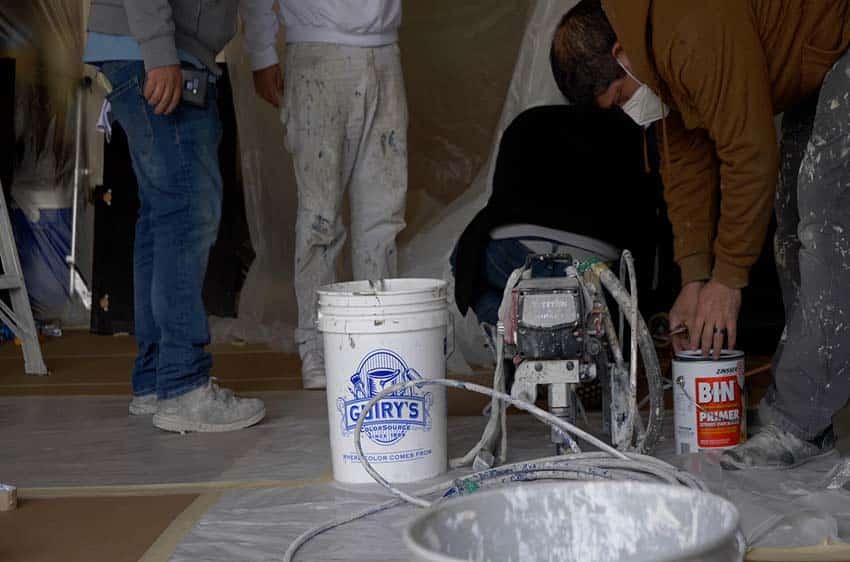
The type of primer you use when painting cabinets makes a large impact on how the cabinets perform over time. Traditionally, Oil Based Primers have been the best option, but as regulations around VOCs have increased, professional painters have started to use different products such as Shellacs or even Hybrid primers like Stix.
The primer you use should be able to cover all of the tannins (brownish or tannish discoloration) in the wood and prevent the oils from coming to the surface. Your primer needs to create a solid bond between the wood and the top coat. Lastly, you need to be able to easily sand the primer down into a smooth coating on the wood. In most cases, it’s best to do two coats of primer and lightly sand between each coat.
Finally, you’re ready to paint! Painting is one of the shortest steps when it comes to refinishing your kitchen or bathroom cabinets. Before any painting occurs, you need to pick the sheen to be used on your cabinets. The most common sheen to use on cabinets is a Semi-Gloss. However, some manufacturers do make High Gloss or Matte finishes that can be used on cabinets as well. The more sheen there is to the top coat, the more durable the finished product will be. We advise you to not paint product test samples directly onto your cabinet surfaces. Instead, we recommend using Samplize to test your products before finalizing anything. They provide peel-and-stick paint samples so you can visualize everything before making a purchase. Check out our color design center to see some of our favorite interior colors and to learn more about paint sampling.
We always encourage using a high-quality product that will last. We’ve found that cabinets painted with cheap paint will fail quite quickly. A lower-grade paint tends to varnish faster and can’t hold up to the wear and tear that your cabinets are bound to endure.
We recommend using one of two products: Sherwin Williams Emerald Urethane Trim Enamel or Benjamin Moore’s Advance. Both of these products will give your cabinets a much longer paint lifespan because they’re specifically designed for painting cabinets and trim. It’s important to know that these products are two-coat products, but since they are water based you can do both coats on the same day. The advancements in coat technology over the last several years have greatly reduced the amount of time needed between each coat. It’s now possible to paint cabinets in as little as 2 to 3 days and have an excellent finished product.
The last step to painting your kitchen cabinets or your bathroom vanities is to reinstall the freshly painted/cured doors and drawers to your newly painted cabinet boxes.
First, you need to reattach your handles and knobs or install your new hardware. After that’s complete, you’ll reattach the doors and drawers. During this process, it’s best to have a person there to assist you to make sure all your drawers are hung square. If any adjustments need to be made, a second set of hands and eyes will certainly help to get your cabinets hung just right!

Keep in mind, that you might have a few minor touch-ups to do after everything has been put back together. For touch-ups, you’re going to want to use a foam roller and not a brush. This will ensure you don’t leave any brush marks behind on your newly refinished kitchen cabinets.
Lastly, it’s time to get your home fully cleaned up. This will involve removing all of the tape, plastic, and paper from the work site. Once everything is removed you’ll need to clean the counters, swiffer the floors, and vacuum if necessary. Once this is done you can fully enjoy your fresh kitchen renovation!
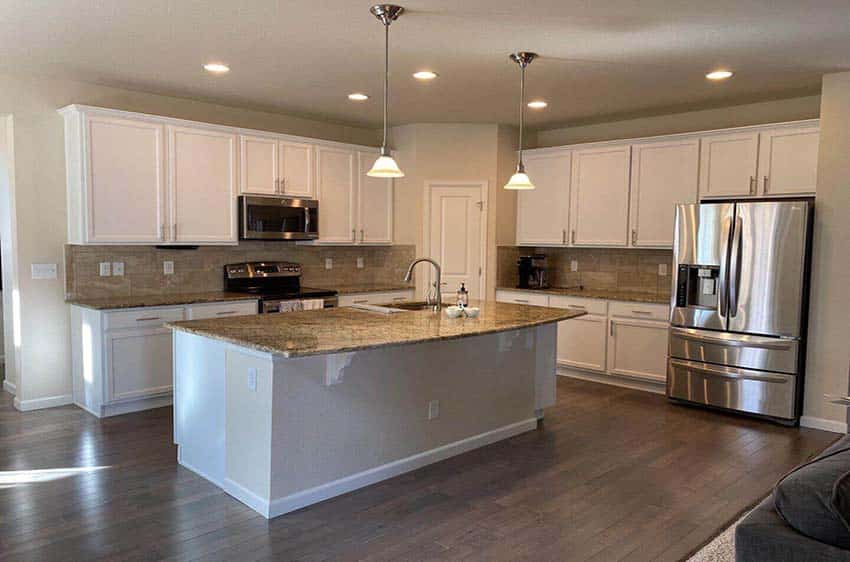
We hope you found these 6 steps to painting your kitchen cabinets helpful! Keep in mind that this system can easily be applied to any cabinets in your home including bathrooms, wet bars, and workshop cabinets. For more tips and tricks, follow us on Pinterest! Also, be on the lookout for more blog posts about interior and exterior painting at www.kindhomesolutions.com.